> For the complete documentation index, see [llms.txt](https://docs.blockflow.network/llms.txt). Markdown versions of documentation pages are available by appending `.md` to page URLs; this page is available as [Markdown](https://docs.blockflow.network/cli/advanced/console-account.md).
# Console Account
To manage and oversee all deployed instances and their associated metrics, you need a Blockflow console account. If you do not already have one, [create a new account](https://app.blockflow.network/). After account creation, select your desired plan. You can then create a new project, or a default project named "First Project" will be provided.The Blockflow console serves as a platform for monitoring various aspects of your deployment, including metrics, instances, databases, and APIs. Additionally, it allows you to query and interact with any deployed databases directly from the console.
***
### Obtaining User ID and Project ID
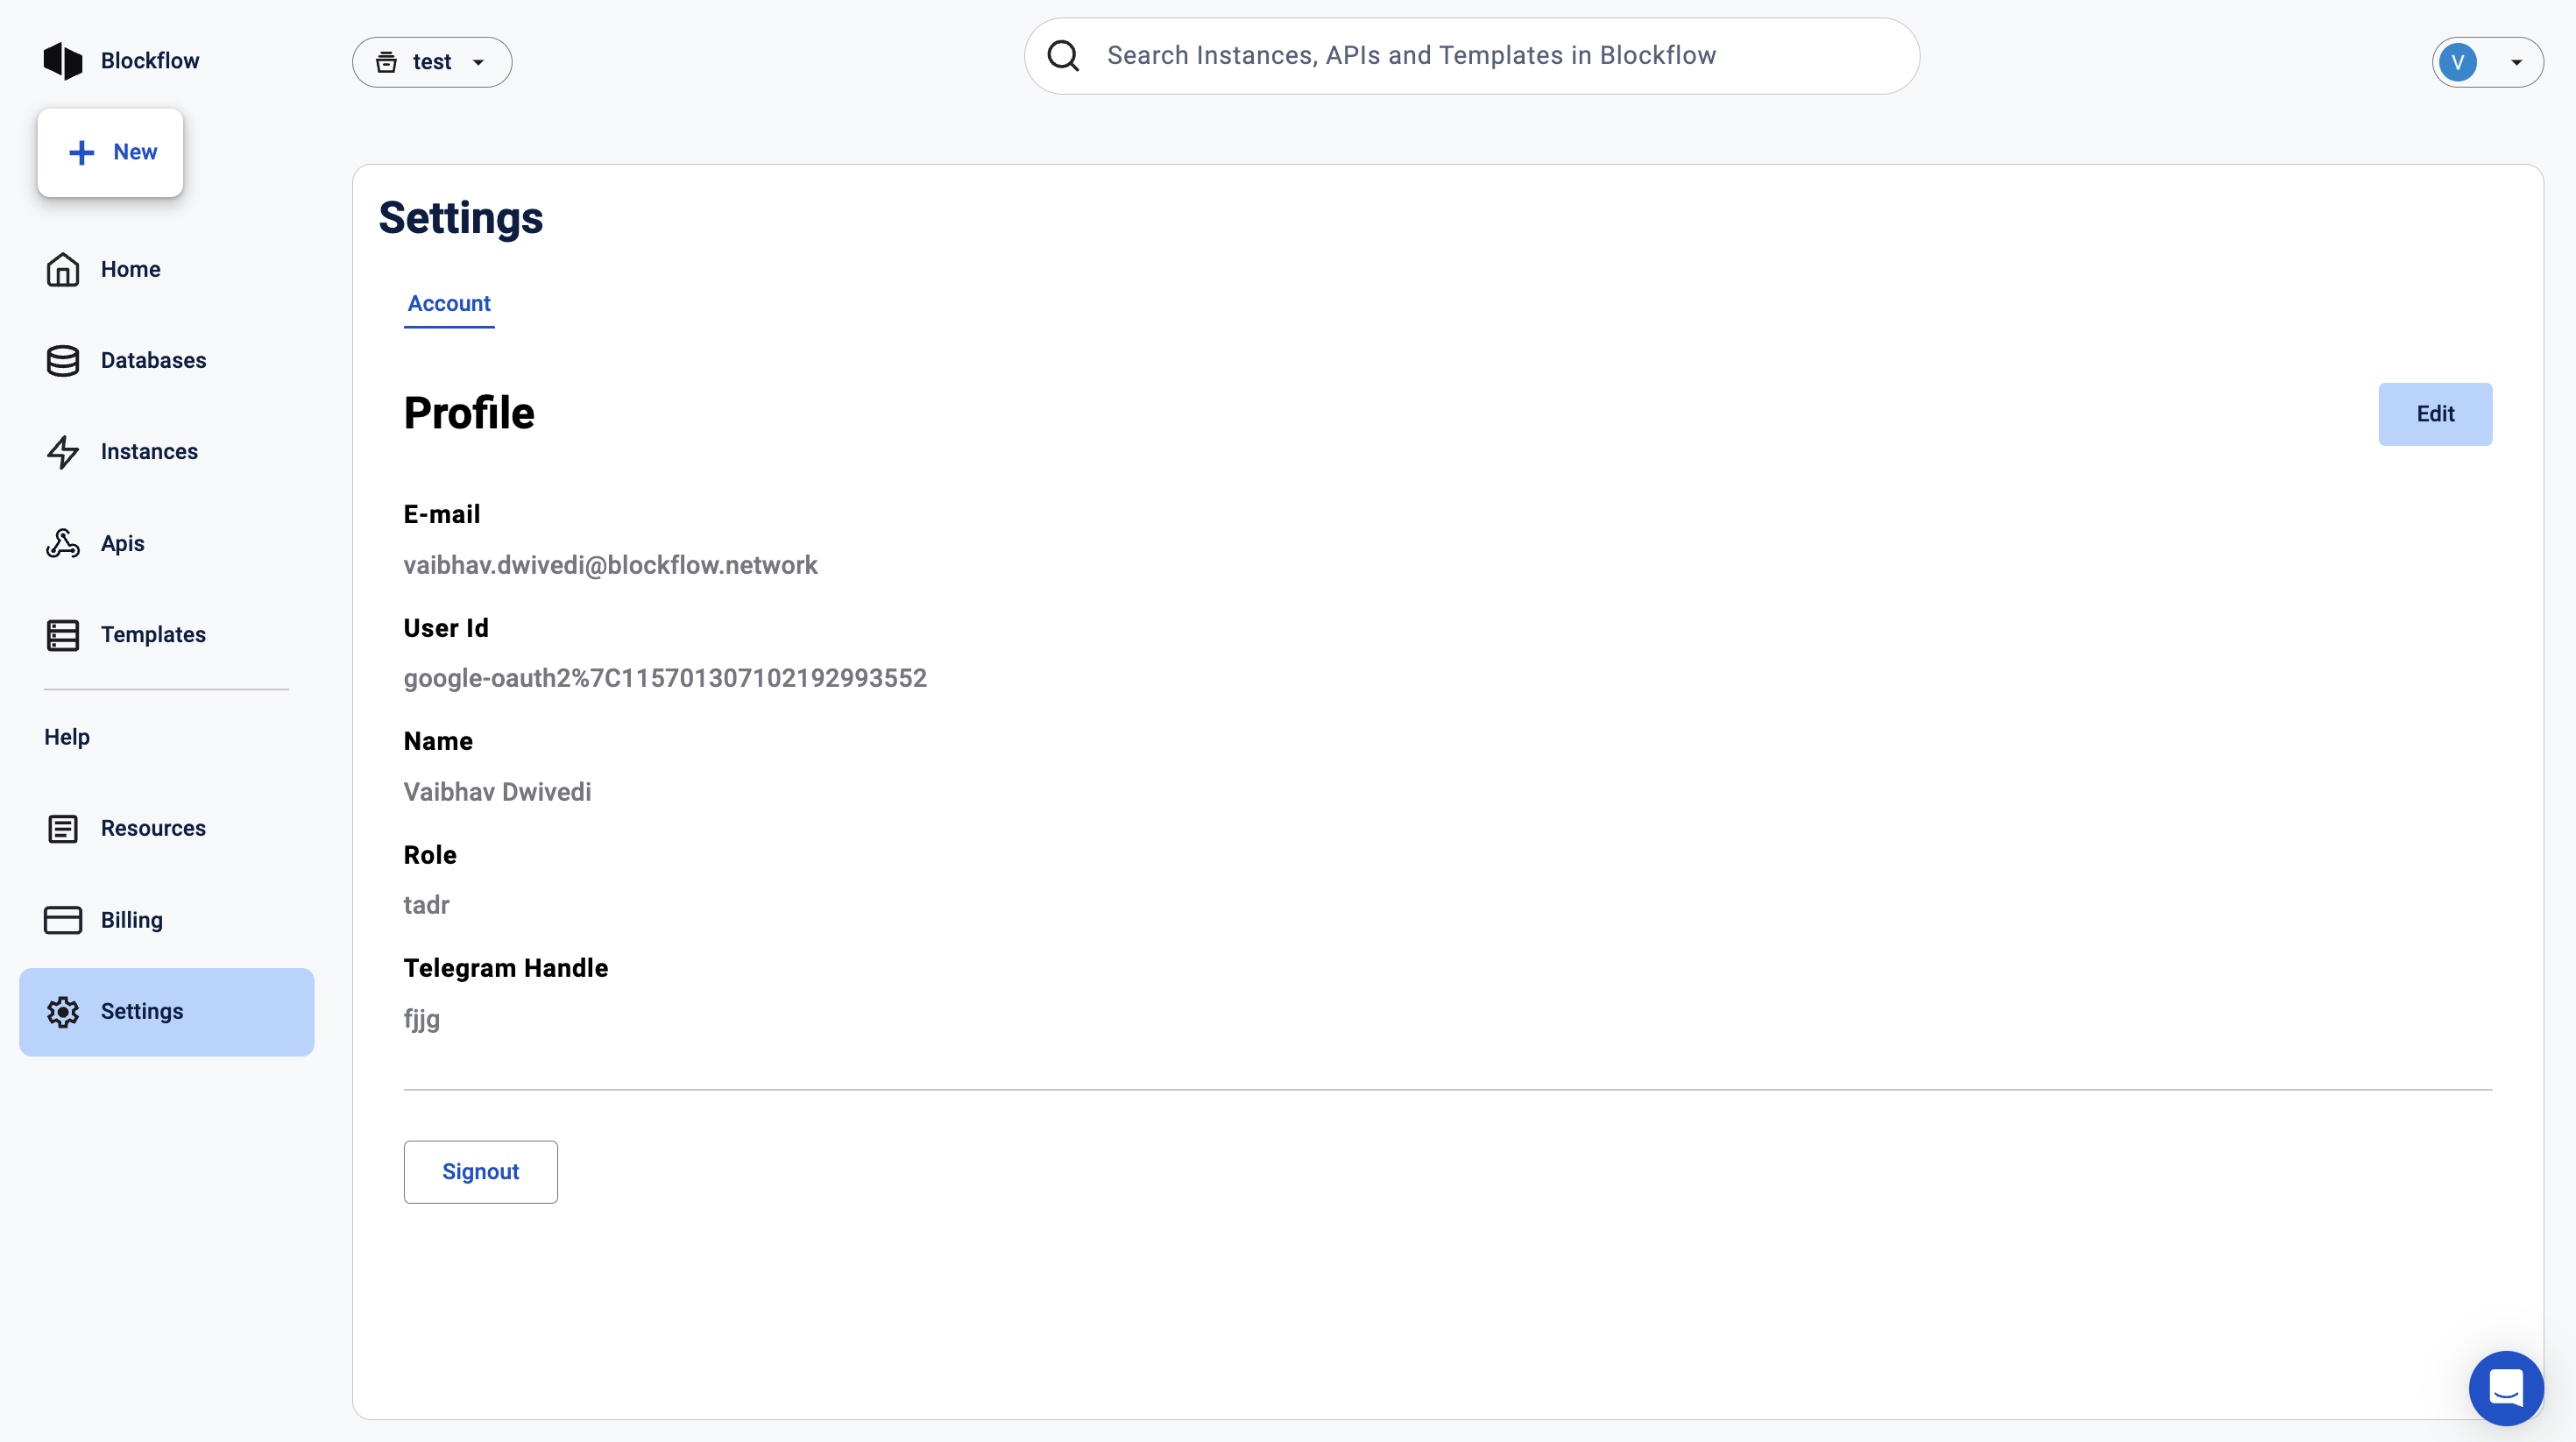
To retrieve your userId, navigate to the "Settings" tab within the Blockflow console. Once there, you can locate and copy your userId.
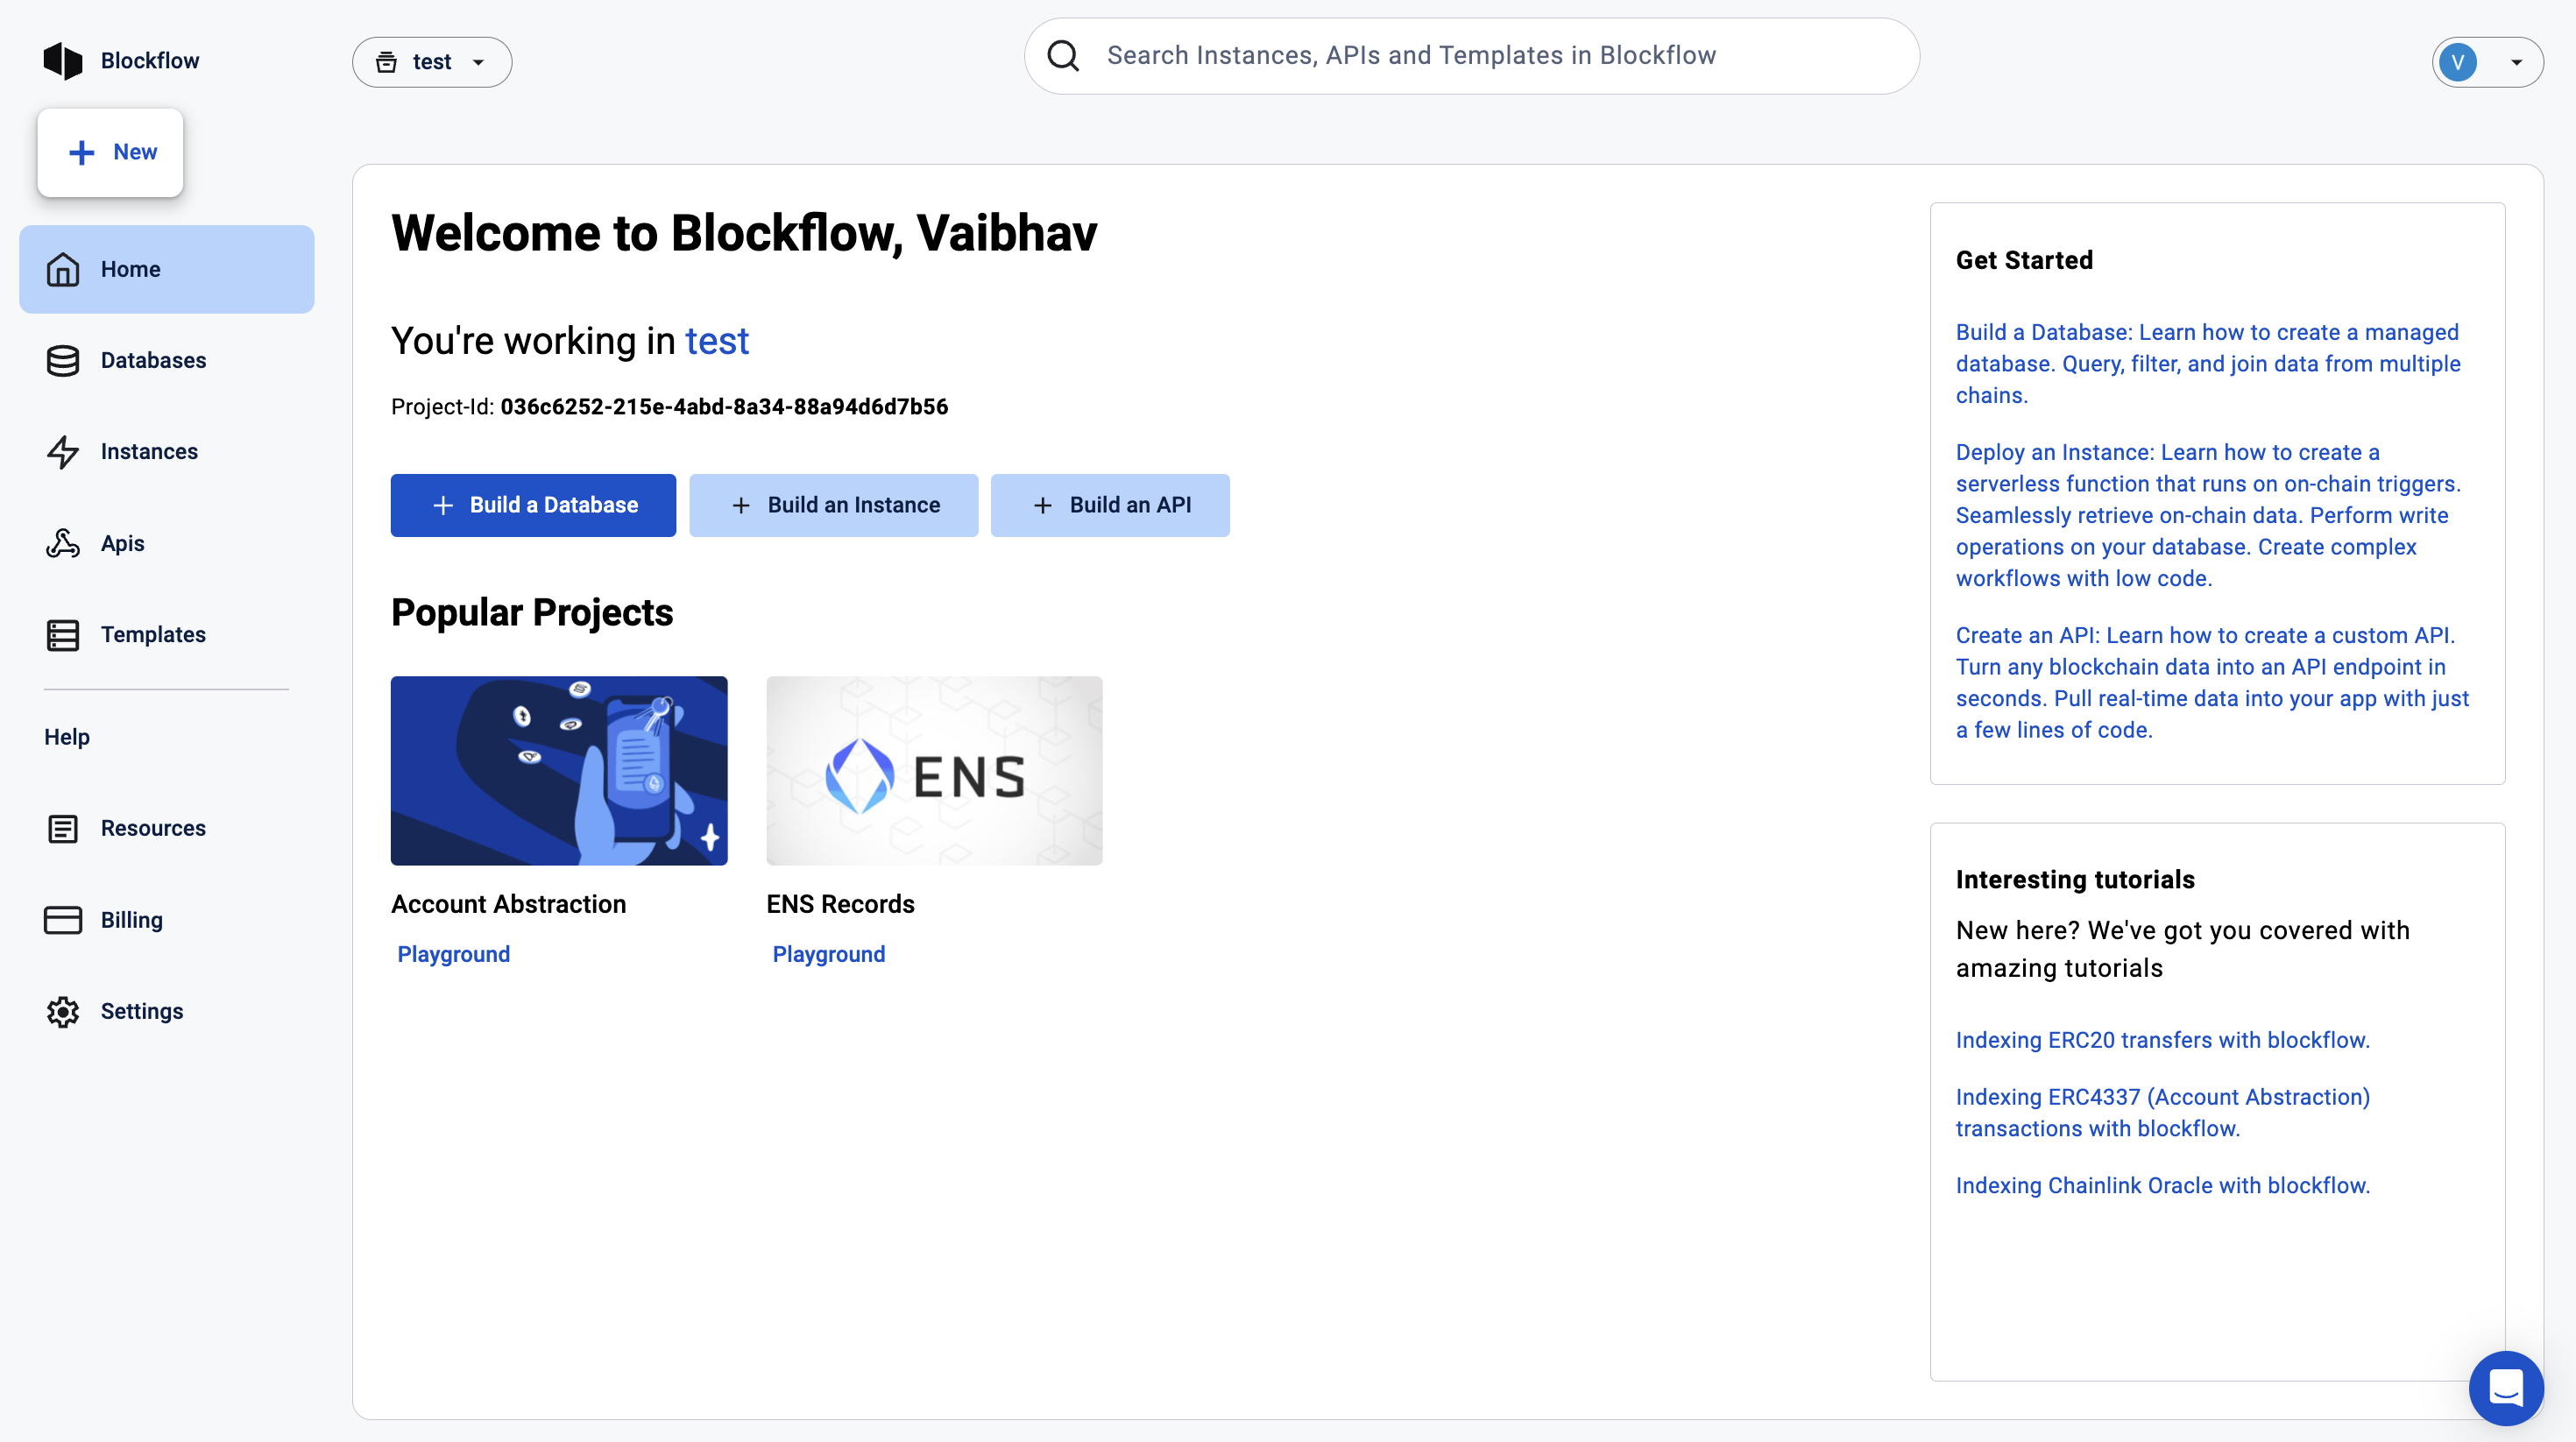
To obtain the projectId, go to the home page of the specific project you are working with. The projectId will be displayed underneath the project name. Copy this value.
---
# Agent Instructions
This documentation is published with GitBook. GitBook is the documentation platform designed so that both humans and AI agents can read, navigate, and reason over technical content effectively. Learn more at gitbook.com.
## Querying This Documentation
If you need additional information that is not directly available in this page, you can query the documentation dynamically by asking a question.
Perform an HTTP GET request on the current page URL with the `ask` query parameter:
```
GET https://docs.blockflow.network/cli/advanced/console-account.md?ask=
```
The question should be specific, self-contained, and written in natural language.
The response will contain a direct answer to the question and relevant excerpts and sources from the documentation.
Use this mechanism when the answer is not explicitly present in the current page, you need clarification or additional context, or you want to retrieve related documentation sections.